Riley's Senior Session

When I connected with Riley for his senior session we knew we wanted to stop by Questrom School of Business for a photo or two, and maybe some locations where he lived during his time here in Boston, but Riley is also a runner!

So with that in mind, we headed to Nickerson Field where there is a nice running track. A lacrosse game was taking place and we weren’t there long before someone came along and told us we had to be on the list to be on the field. Seeing as I am a photographer for BU and have needed to “be on the list” to shoot an occasional game, I’m not sure why this didn’t occur to me. Fortunately, we got a few track shots in before we skeedadled out of there.

Riley is heading off into the world of finances after he graduates from Boston University in May.

Michaela's Senior Session

As graduation season approaches, I am so excited to have some new clients! I love my family sessions, portraits and events, and working with high school and college seniors only adds to the fun and variety of my work.

When I met Michaela in Marsh Plaza at Boston University for our session, she was wearing her master’s robe. I asked her if she wanted a combination of robe shots and non-robe shots, and she told me that she’d worked too hard to not wear her robes for all the photos. I love this. She HAS worked hard!

We wandered campus, and went into the School of Law as well, which is where she is graduation from. I mentioned the space with lockers, which law students use to store their items during their long days of studying how to do lawyer-y things. I was so glad that space had relevance to her because the light was so beautiful, and it added an extra, interesting location to her collection.

I was honored that she shared with me a bit about her late-mother who was a teacher, is greatly missed, and who we incorporated into some of her shots as well. Her mom would be so proud of her!

(click to enlarge)

Please, Wear a Mask

When someone books a session with me, they receive a booking confirmation email with paperwork and details about what to expect from a session with me.

For the first time, (and hopefully the last), I added a paragraph;

One more thing about your session - Please come to your session wearing your masks so I can take a few photos of you as a family wearing them. I know this may seem like a strange request, but I feel compelled to record this weird time in our history, with hopes that a year from now it will be a thing of the past. If later on you do not want that photo of your family all wearing masks, you don't have to look a them. But if it strikes you as telling part of your family's story, your experience, you'll have it! (I will email your mask portrait to you for free after your session).”

I wondered if there would be push-back on this. Would my clients not want this horrific experience documented? Would they prefer I simply photograph their family, or outdoor bar mitzvah, or couples session as though it was any other year? I can’t say I would blame them if so. I thought for sure that some people would ask that I not photograph them wearing their masks, or they would ask that the images not be shared.

There was not one objection. They all seemed to understand the importance of taking such a photo. In fact, many expressed how important they thought it was to document it. Some have even mentioned including it in their annual holiday card this year! Documentarians after my own heart!

I find the children especially interesting in these photos. Some have eyes that shine bright while they smile beneath the fabric, many wear their masks with comfortable acceptance, and some have the body language of pure fed-upness. I hear you, kid.

I am often expressing gratitude for my clients on this blog and today is no different. They helped me do something unusual during a most bizarre and unsettling year. They connected with me for family photos, and every last one graciously accepted a request from me and the result is this collection.

For my clients, and many other reasons, I am so thankful!

(click to enlarge)


Mini Sessions, Round Two!

I usually only host one mini session event in the fall. I invite clients new and returning to pick a time slot on one specific date and meet me at a predetermined location for a quick twenty minute shoot. It’s a great way to get family photos and for me it helps me provide photography for multiple clients during the busiest time of the year for me.

After my annual mini session day took place, my sisterfriend Maureen got in touch with me and said that she and a few friends would love to have mini sessions too. Typically I would let my sisterfriendclient know that mini sessions are a one day thing, unless multiple families want them. But in this instance, Maureen simply brought me clients, which was so amazing! I was able to provide photos for her family, her friends’ family, and a third family who signed up after I promoted the event.

We shots these photos out in Sudbury. It was a blast, the weather cooperated, and we met for the best light - in the late afternoon!


Linda and Mike's Family

Linda got in touch with me after high school friends and clients Alison and Beth kindly recommended me to her for a session with her blended family.

I arrived early at our meeting place, Horn Pond in Woburn. I hadn’t been there before and wanted to scope it out before starting around with the family for their session. Our meeting time came and I didn’t see the family - I knew there was Mike and Linda, their golden retriever Jax, and four nearly adult kids with a fifteen year old being the youngest.

I spotted such a family, but they were being photographed already. Something seemed weird to me. Was that my family and had they brought a friend to take photos during our session? Or maybe they’re just playing around before I find them? I was so confused! Perhaps it was just a coincidence that another family with grown kids were having a session at the same time.

I kept side-eyeing the group with that other photographer though. That dog! Along with sending the names and ages of everyone as I’d requested, Linda also sent me a photo of her dog, Jax. Golden and white-faced. That was the dog!

Then as I milled around awkward and confused, I heard some of them say “Summer!” which is Linda’s daughter’s name. That’s when I knew for sure, THIS WAS MY FAMILY!

I approached them and we discovered that the photographer who was working with them had also been waiting for a client named Linda. Apparently the photographer had not really introduced herself or asked for everyone’s names before jumping in and starting a session with the wrong family.

“Well, thanks for warming them up for me!” I joked with the photographer and we had a good laugh.

The family and I marveled at the bizarreness of the situation as we made our way to the first spot for a photo, and Linda said “Somehow it didn’t seem right!” She felt the personality of the imposter photographer didn’t match up with what she expected from someone recommended by Alison and Beth, two of the funniest women you’ll meet. Linda also noted that the other photographer was posing them in a way that didn’t seem to match with my style of shooting.

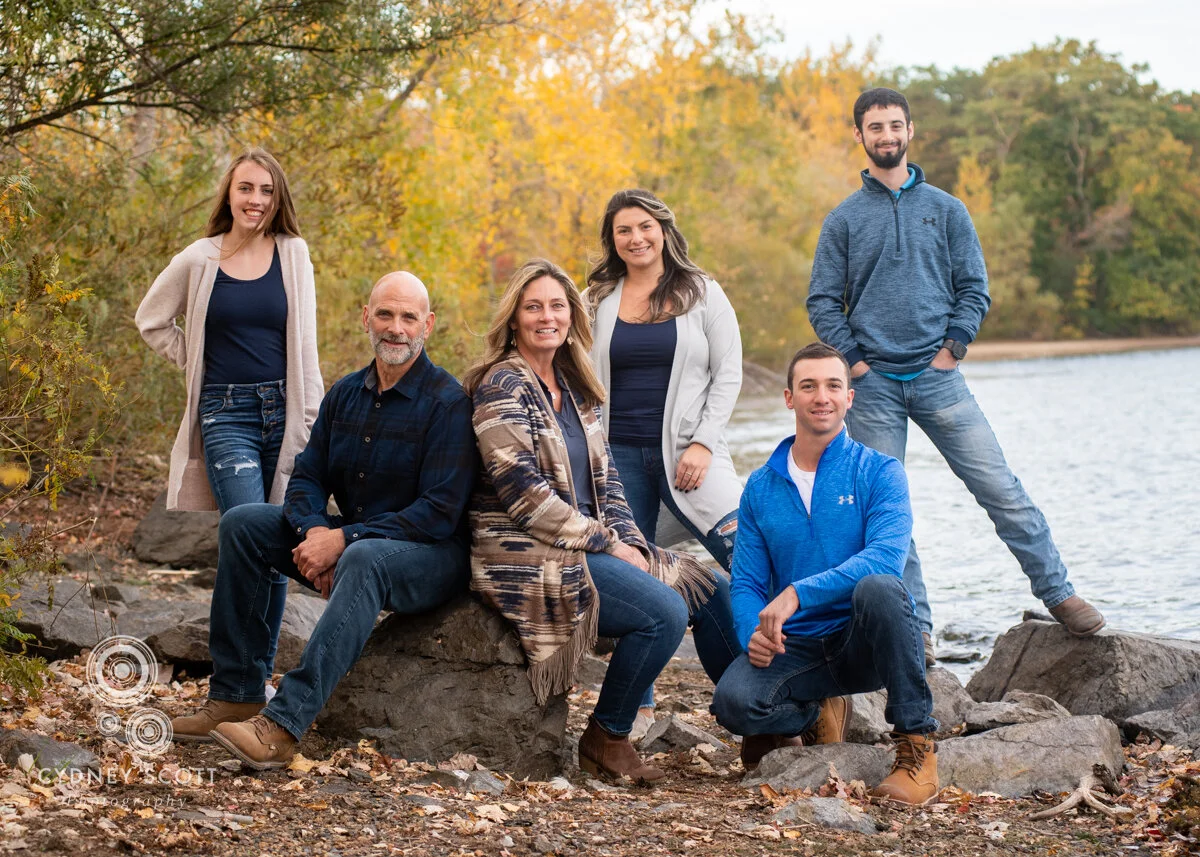
As we stood pond-side for our first shots, I said or did something goofy or funny and Linda said, with some relief “OK, yes, this makes much more sense!”

We had a delightful time, and I discovered beautiful Horn Pond in the process!

Mini Sessions, Round One!

Dig, if you will, a picture; You’ve booked your time slot for your annual mini-session with me. You’ve gotten your kids into their best outfits and made it from your home to Maudslay State Park in Newburyport for your session without anyone asking if you’re there yet or saying they’re thirsty.

You drive along the road where you can view a vast field in the park. And in that field…art installations, along with many many people enjoying said art installations. Interesting.

Not sure where we’re going to take pictures then.

You pull into the parking lot, which is overflowing, navigate your way around the myriad of masked visitors, and just as you pull into your spot with time to spare for your session, you get a text from me, your photographer.

“When you arrive, come to the back of the lot to that big, white clabbered house. Those are the bathrooms! We’re going to take photos back here. See you soon!”

Um, I paid good money for this?

My clients are the best. After their initial Uh…what? wore off, they all went with the flow. I think the results were delightful, and we managed to avoid the crowds as well.


Will and Avery!

This year, twins Will and Avery and their parents met me at Land’s Sake Farm for our session at Lauren’s (mom) suggestion and it was a great choice!

Located in Weston, the farm (you should click on the link above and check them out!) welcomes photo shoots (we left a donation). Their grounds are lovely and rustic, and it was fun to wander and shoot along the way.

Kristin, Benjamin and Co

I think we can all agree that things are pretty rough right now. Political unrest, a pandemic making a mess of everything. At the time of this session in August, that was no different, and it was gross and hot too!

I felt some levity when I heard from Kristin who said her family was due for a session. I have photographing them since, well before they were a family! My first session with Benjamin and Kristin were for their engagement. Now they have two beautiful sons and I have had the honor to photograph them as they grow too.

Seeing them and capturing them together brought some light to my week!


Joseph and Gerard

Joseph was visiting Boston with his husband Gerard when he contacted me through my Instagram page. The two were looking to have a family session along with their dog Donatella Versace. Donatella Versace?! Sign me up!

I was honored that they wanted to work with me, someone they found out of the blue via IG, and I thought it was a great thing - a photo shoot - to add to a vacation getaway.

They graciously made the trek up to Salem so we could avoid the Boston city crowds and have a session at Salem Willows.

In the midst of this sometimes isolating pandemic, a session with this lovely pair and their sweet pup was a welcome pick-me-up!

(click to enlarge pics)


Photographing a Bobcat!

Last summer I was contacted by my alma mater Ohio University. They hired me to photograph a fellow Bobcat in my area who had been chosen to make a local TedTalk about her passion for running. Passion to run a half marathon in all 50 states before reaching age 50, to be exact.

Woah!

The first time I photographed Tiffany, I got up god-awful early for good light and we wandered her neighborhood in south Boston and found great spots to capture both her, and the beautiful place she run in.

A week of so later, I visited her at Salem State College and photographer her there too.

You can click here to read the story about Tiffany, an amazing woman, and here are some shots that didn’t run. One of my favorites is the one where I asked her to be all serious, standing in the sun, and she just couldn’t do it. What a smile!


Bring More Kiddos To Jump on the Beds!

I have always loved photographing people in their bedrooms. It’s not because I’m a weird snoop or constantly on the lookout for interior design inspiration. Bedrooms are a reflection of their owners, and can be their cozy sanctuary away from the rest of the world.

Often when I come into a client’s home, with the parents’ permission I’ll ask one of the kids to show me their room. Showing me around can help them feel important (which they are!), and showing me their favorite toys often helps a shy kid open up, so they feel less weird about their family session once we get going.

Shooting in bedrooms can give my clients a sense of ease and comfort, as well as a little time capsule to look back on in the years to come and remember how itty bitty their kids were, and what the space looked like when they were a young family together. As for the kids, I would love to have a photo of myself in my room as a kid - my soccer ball on the floor, The Bangles poster on the wall and my My Little Pony collection on display in all their rainbow glory. They are fun pictures to have in the future.

Here are some of my favorites through the years;

Post Those Photos in Real Life!

Happy New Year!

If one of your goals for this next decade includes finally getting your photos displayed in your home, this write up is for you!

One of the most exciting things to see when I return to clients’ homes for an annual shoot is photos from past sessions displayed on their walls or on tables in frames. In this fast-paced world it’s so easy to take those digital files and tuck them away and never get around to printing them and enjoying them.

A while back a friend of mine asked for help with laying out her photo wall. It was a lot of work, but I had a blast going through her photos, helping her choose which to go on the wall so that in the end, the story of her family ran the length of her staircase.

I thought I would share some pointers in case you wanted to take some photos from a session with me, and create a display with them. Of course, if you have the drive, you can take photos from your personal collection and apply these rules too, but for this example, I’ll use photo from all one shoot I had recently.


How to choose what goes on the wall

  1. Choose an anchor photo. The anchor photo is the largest photo, or one of the largest photos, and tends to be centered among all the other photos in your wall layout. It should be one of your favorites. In the example below, I chose two siblings having a moment.

  2. The goal is for your wall to tell a story. Avoid an entire wall of people looking straight out at the viewer and create visual interest by choosing photos with a variety of expressions, crops and compositions.

  3. Consider a photo that is a break from the expected but still contributes to the overall look. In this layout, the photo of the hands holding the pinecone accomplishes this.

  4. Make sure your subjects fill the frames differently. Don’t fill your wall with a bunch of full-body shots. Have some with medium crops (waist up), tight shots of faces, and looser shots that show the subjects within an environment that tells a story or adds to the overall effect of the collection.

layout-2.JPG

Layout and hanging directions;

What you’ll need -
brown craft paper (comes in a roll)
painter’s tape
frames in a variety of sizes
prints of your photos (they can be small 4x6s for the time being, and printed at home. They don’t even need to be in color.)
hanging supplies for when you are actually working on the wall.
toothpaste

  1. Gather up all the frames you want to use. In my home I prefer simple frames so the focus is on the images, but variety of styles can be can be great too.

  2. Do a search online for “photo wall layouts” or explore Pinterest using the same search words for layout inspiration. I found the layout I used in this entry HERE.

  3. Once you have your frames, lay them out on the floor in a rough layout of how you’d like them to be on the wall. I start with the largest frames, then balance the whole wall out by adding the smaller frames around them.

  4. Place the photos (remember, they can be just small quick prints at this stage) on the frames on the floor. When you’ve made a final decision of which photos you want in which frames, you’ll know how large each photo needs to be printed according to the frame it’s with. Consider taping the small photo to the glass of the frame for safe keeping once you’re sure you want it in that particular frame. Remember to print your photo to fit the size of the mat within in the frame, not the frame itself.

  5. Photograph the whole collection on the floor. Immediately email that photo to yourself.

  6. Slide the brown packing paper under each frame one at a time. Cut the brown paper to match the size of the frame and make a quick stick figure sketch of the corresponding photo onto the brown bag (or, just take a copy of the photo that’s on the frame and tape it to the brown cutout).

  7. Use those brown cutouts to then lay out the wall, using the photo you took of the frames for reference, and taping the brown rectangles to your wall with the painter’s tape.

  8. Move your brown paper placeholders around until they feel right on the wall, being careful to leave breathing room around the frames. Consider the height of the frames as well. Do you want to add more frames later? Is there room to do so? Will little ones be able to reach them where they are currently placed and is that a concern?

  9. To figure out exactly where to place the nail on the wall, dab a spot of toothpaste on the teeth of the frame hanger, and gently place the frame where it will ultimately go, leaving a toothpaste mark on the brown paper. You can then hammer the nail straight through the brown paper, right where the toothpaste is. Then simply removed the brown paper and replace it with a frame!

When I want to update my wall, I will often add photos to the frames currently hanging, leaving the previous photo behind the new one in the frame.

2019 Fall mini Sessions Wrap-Up

I recently held my annual Fall Mini Session Event. It was quite a day! When I arrived at Salem Willows Park I found that most of the trees in the large park had been damaged by the massive storm earlier in the week and the trees that still stood had not yet changed to striking New England fall colors as I had ordered. The nerve of Mother Nature! In addition to the End of The World appearance of the park there was some kind of video crew shooting in various spots, and a wedding being performed.

My clients, being the awesome folks they are, took it all in stride. We took advantage of the park’s beach and the lovely afternoon light resulted in some great shots. That and puppies. Pictures are always better with puppies.

Holiday Card Design Advice

One of my favorite things about the holiday season is when the cards start coming in. I hang the cards on my wall, and thanks to the popularity of photo cards, before long I have my own little gallery up. It’s great!

Here are some thoughts about what I personally think makes a holiday card really pop!

1. In my opinion, card recipients want to see a clear, beautiful portrait of you and your family/kids/dog, front and center. Make your photo the feature of your card by avoiding designs that take up half the card with sentiments. The sentiments are lovely, of course! but even better is your smile. If you do choose a more elaborate card, use very simple photos (like tight headshots) so that there are not competing design elements, creating a busy, un-peaceful mess.

2. If you’d like your family’s photo to be the featured photo, zoom in on the action - your faces! Sure, you may have gone to the beach this summer and want to share that news, but a beach shot where your family is tiny in the frame just doesn’t feature you the way your card-recipients want to see. Save a shot of your guys burying each other in the sand for the backside of the card, which will contribute to telling a little story about your year!

At right is the original crop, which I zoomed in on for the best effect on the card. When zooming in, be conscious not to crowd the subject by coming in too tight.

At right is the original crop, which I zoomed in on for the best effect on the card. When zooming in, be conscious not to crowd the subject by coming in too tight.

4. After you have a well-lit, nicely cropped shot of the whole family for the cover photo (or maybe just the kids, that’s cool too), use the back of the card to share photos that tell the story of your family. Avoid similar photos - four pictures of your kids from the waist-up smiling in the same manner is kind of boring. A shot of your daughter playing a game of soccer and another of your son engrossed in a project are more interesting, and for those who haven’t seen your kids in years or perhaps haven’t even met them, well, they’ve just learned something about your child! Also, if you’ve included a nice cover photo of the whole family looking into the camera, you don’t need a replica shot on the backside, so - go candid!

Screen Shot 2020-10-28 at 4.39.19 PM.png
Screen Shot 2020-10-28 at 4.39.13 PM.png

Do you like a card that’s more design-heavy? Consider a simpler photo, like the ones used in the below samples. Converting your photo to black and white can help avoid clashing colors too.

Screen Shot 2020-10-28 at 4.47.28 PM.png
Screen Shot 2020-10-28 at 4.49.28 PM.png

Click on the thumbnails below and roll your mouse over the opened photos to read more tips. Again, these are all made from shoots during my sessions, but I encourage you to add your favorite candid shots from the year to share with your recipients! (I used mpix.com to create these cards samples).

Happy designing!